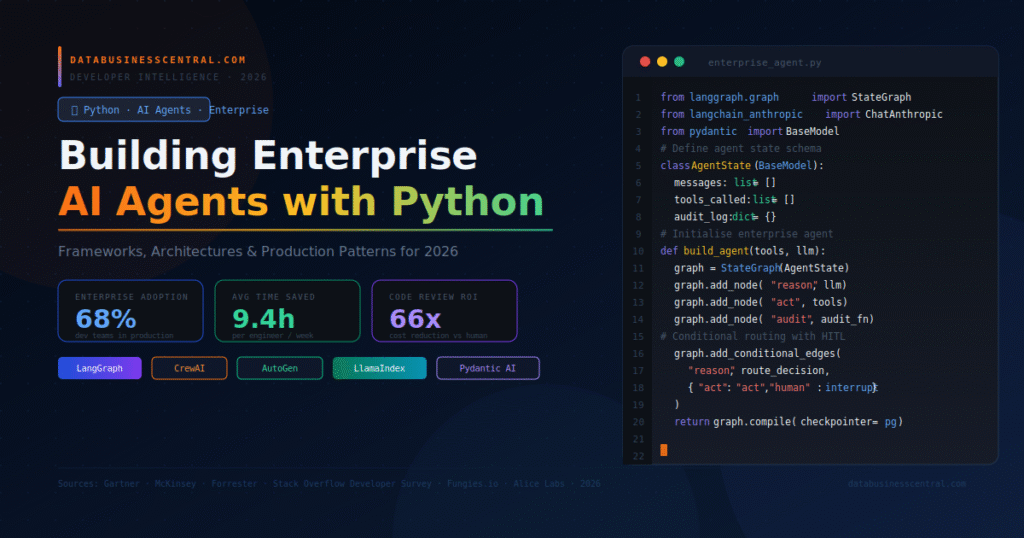
There is a difference between building something that talks and building something that acts. Chatbots belong to the first category. AI agents belong to the second.
An AI agent takes a goal, decides which tools to use, executes them, observes the results, and decides what to do next — looping until the task is complete or a stopping condition is triggered. That single design shift — from one-shot response to goal-directed loop — is why companies like Klarna, Uber, LinkedIn, and JPMorgan are running agents in production rather than chatbots.
By early 2026, over 65% of enterprise software teams are shipping at least one AI agent into production. The Python ecosystem is where almost all of that work happens. This guide walks you through building your first Python AI agent from scratch — not a toy demo, but a real, runnable research agent you can extend and deploy.
By the end, you will understand the three core layers of every Python AI agent: the LLM backbone, the tool layer, and the memory layer. You will have working code at each step.
Why Python Dominates AI Agent Development
Python did not become the language of AI agents by accident. Every major agentic framework — LangGraph, CrewAI, Pydantic AI, AutoGen — ships Python as its primary runtime. LangChain alone integrates with more than 700 third-party connectors as of mid-2026, the largest integration library in the ecosystem.
LangGraph reached v1.0 in late 2025 and is now the most widely adopted Python framework for building production AI agents. The GitHub repository has exceeded 33,900 stars and 34.5 million monthly downloads. The broader LangChain ecosystem — core package plus langchain-core, community, and integration packages — exceeds 220 million monthly downloads monthly.
The market around these tools is scaling just as fast. The global AI agents market is projected to reach $47.1 billion by 2030, growing at a CAGR of 44.8%. Python is the language doing most of that work.
What You Are Building
By the end of this guide, you will have a working research agent that:
- Takes a research question as input
- Searches the web for relevant information
- Reads and processes the results
- Decides whether it has enough information to answer
- Returns a structured summary if it does, or searches again if it does not
This is a real agentic loop, not a single LLM call with a fancy wrapper. Let’s build it step by step.
Step 1: Environment Setup
Use Python 3.11 or higher. Create a fresh virtual environment and install the 2026 stack:
bash
python -m venv agent-env
source agent-env/bin/activate   # Windows: agent-env\Scripts\activate

pip install langgraph==0.3.34 \
            langchain-anthropic \
            langchain-community==0.3.19 \
            tavily-python==0.5.0 \
            python-dotenv==1.1.0
Pin your versions in production to avoid breaking changes. LangGraph follows semantic versioning post-1.0 — always check pip index versions langgraph for the latest stable release before starting a new project.
Create a .env file in your project root:
ANTHROPIC_API_KEY=your_anthropic_key_here
TAVILY_API_KEY=your_tavily_key_here
Why Tavily? Tavily is a search engine built specifically for AI agents. It returns clean, structured results rather than raw HTML, which means your agent spends tokens on reasoning instead of parsing. It offers 1,000 free API requests per month — more than enough for development.
Never hardcode API keys. Load them with python-dotenv:
python
from dotenv import load_dotenv
import os

load_dotenv()
ANTHROPIC_API_KEY = os.getenv("ANTHROPIC_API_KEY")
TAVILY_API_KEY    = os.getenv("TAVILY_API_KEY")
Step 2: Understanding the Agent Loop
Before writing code, understand what LangGraph actually does. Every LangGraph agent is a directed state graph:
- State — a Python dictionary that flows through the entire graph. Every node reads from it and writes to it. Think of it as the agent’s working memory.
- Nodes — individual functions or actions (call the LLM, execute a tool, format output).
- Edges — transitions between nodes. Conditional edges route based on runtime state.
The agent loop looks like this:
User Query → [Reason] → should I use a tool?
                           ↓ Yes         ↓ No
                        [Act]        [Respond]
                           ↓
                    [Back to Reason]
LangGraph manages this loop, state persistence, retries, and human-in-the-loop interrupts as first-class primitives — not workarounds you bolt on after the fact.
Step 3: Define Your Agent State
The state schema is the most important design decision in any LangGraph agent. Get this right and everything downstream is simpler.
Create a file called agent.py:
python
from typing import TypedDict, Annotated
from langgraph.graph.message import add_messages

class AgentState(TypedDict):
    # The conversation history — add_messages appends instead of replacing
    messages: Annotated[list, add_messages]
    # Raw search results from Tavily
    search_results: list[str]
    # The final structured answer
    final_answer: str
    # How many search iterations the agent has run
    iteration_count: int
The Annotated[list, add_messages] pattern tells LangGraph to append new messages to the list rather than overwrite it. This preserves the full conversation history across multiple reasoning steps — which is what makes the agent stateful.
Step 4: Configure the LLM and Tools
python
from langchain_anthropic import ChatAnthropic
from langchain_community.tools.tavily_search import TavilySearchResults
from langchain_core.tools import tool

# LLM: Claude Sonnet 4.6 — reliable reasoning, fast response
llm = ChatAnthropic(
    model="claude-sonnet-4-6",
    temperature=0,           # deterministic reasoning
    max_tokens=4096
)

# Web search tool — returns up to 5 structured results per query
search_tool = TavilySearchResults(
    max_results=5,
    search_depth="advanced",   # deeper crawl, better results
    include_answer=True        # Tavily's own summary alongside raw results
)

# Custom tool example — wrap any Python function as an agent tool
@tool
def calculate_reading_time(text: str) -> str:
    """Estimates reading time for a given block of text."""
    word_count = len(text.split())
    minutes = round(word_count / 200)   # average adult reading speed
    return f"Estimated reading time: {minutes} minute(s) ({word_count} words)"

# Bind tools to the LLM — this tells the model what it can call
tools = [search_tool, calculate_reading_time]
llm_with_tools = llm.bind_tools(tools)
The @tool decorator is LangChain’s way of turning a plain Python function into a tool the agent can discover and call. The docstring becomes the tool description — write it clearly because the LLM reads it to decide when to use the tool.
Step 5: Build the Agent Nodes
Nodes are the functions your agent executes. Each node receives the current state and returns a dictionary of state updates.
python
from langchain_core.messages import HumanMessage, AIMessage, ToolMessage
import json

# Node 1: The reasoning step — the LLM decides what to do next
def reason(state: AgentState) -> dict:
    """LLM reviews the state and decides: answer now or use a tool."""
    response = llm_with_tools.invoke(state["messages"])
    return {
        "messages": [response],
        "iteration_count": state.get("iteration_count", 0)
    }

# Node 2: The action step — execute whatever tool the LLM requested
def act(state: AgentState) -> dict:
    """Execute the tool calls the LLM requested."""
    last_message = state["messages"][-1]
    tool_results = []
    search_results = list(state.get("search_results", []))

    for tool_call in last_message.tool_calls:
        tool_name = tool_call["name"]
        tool_args = tool_call["args"]

        # Route to the right tool
        if tool_name == "tavily_search_results_json":
            result = search_tool.invoke(tool_args)
            # Extract clean text from Tavily's structured response
            for item in result:
                search_results.append(item.get("content", ""))
            result_str = json.dumps(result, indent=2)

        elif tool_name == "calculate_reading_time":
            result_str = calculate_reading_time.invoke(tool_args["text"])

        else:
            result_str = f"Unknown tool: {tool_name}"

        # Return the tool result to the LLM as a ToolMessage
        tool_results.append(
            ToolMessage(
                content=result_str,
                tool_call_id=tool_call["id"]
            )
        )

    return {
        "messages": tool_results,
        "search_results": search_results,
        "iteration_count": state.get("iteration_count", 0) + 1
    }
Step 6: Add Routing Logic
The routing function decides which node to visit next. This is the conditional edge — the decision point that makes the graph an agent rather than a static pipeline.
python
def should_continue(state: AgentState) -> str:
    """
    Decide what to do after the reasoning step.
    Returns: 'act' | 'end' | 'max_iterations'
    """
    last_message = state["messages"][-1]
    iteration_count = state.get("iteration_count", 0)

    # Safety ceiling — prevent infinite loops
    if iteration_count >= 5:
        return "max_iterations"

    # If the LLM requested tool calls, go to act
    if hasattr(last_message, "tool_calls") and last_message.tool_calls:
        return "act"

    # Otherwise the LLM produced a final answer — we are done
    return "end"
The iteration_count ceiling is not optional. Without it, a misconfigured agent can loop indefinitely, burning API credits and never returning. Five iterations is a sensible default for a research agent — adjust based on your task complexity.
Step 7: Assemble the Graph
python
from langgraph.graph import StateGraph, END
from langgraph.checkpoint.memory import InMemorySaver

def build_agent():
    graph = StateGraph(AgentState)

    # Add nodes
    graph.add_node("reason", reason)
    graph.add_node("act", act)

    # Set the entry point
    graph.set_entry_point("reason")

    # Conditional routing after the reason node
    graph.add_conditional_edges(
        "reason",
        should_continue,
        {
            "act": "act",
            "end": END,
            "max_iterations": END
        }
    )

    # After acting, always return to reason
    graph.add_edge("act", "reason")

    # In-memory checkpointer for state persistence within a session
    checkpointer = InMemorySaver()

    return graph.compile(checkpointer=checkpointer)

agent = build_agent()
Production note:
InMemorySaverloses state when the process restarts. For production, swap it forPostgresSaverfromlanggraph-checkpoint-postgres. The graph code stays identical — only the checkpointer changes. This is one of LangGraph’s best design decisions.
Step 8: Run Your Agent
python
from langchain_core.messages import HumanMessage
import uuid

def run_agent(question: str) -> str:
    """Run the research agent and return its final answer."""

    # Each conversation needs a unique thread_id for state isolation
    config = {"configurable": {"thread_id": str(uuid.uuid4())}}

    initial_state = {
        "messages": [HumanMessage(content=question)],
        "search_results": [],
        "final_answer": "",
        "iteration_count": 0
    }

    # Stream events for visibility into the agent's reasoning
    print(f"\n🔍 Research question: {question}\n")

    for event in agent.stream(initial_state, config=config):
        for node_name, node_output in event.items():
            if node_name == "reason":
                last_msg = node_output["messages"][-1]
                if hasattr(last_msg, "tool_calls") and last_msg.tool_calls:
                    for tc in last_msg.tool_calls:
                        print(f"  → Using tool: {tc['name']}")
                        if "query" in tc["args"]:
                            print(f"    Query: {tc['args']['query']}")
            elif node_name == "act":
                iter_count = node_output.get("iteration_count", "?")
                print(f"  ✓ Tool executed (iteration {iter_count})")

    # Retrieve the final state
    final_state = agent.get_state(config)
    final_messages = final_state.values.get("messages", [])

    # The last AIMessage without tool_calls is the final answer
    for message in reversed(final_messages):
        if (hasattr(message, "content") and
            isinstance(message.content, str) and
            not getattr(message, "tool_calls", None)):
            return message.content

    return "Agent did not produce a final answer."


# Run it
if __name__ == "__main__":
    answer = run_agent(
        "What are the main benefits of AI agents for enterprise businesses in 2026?"
    )
    print(f"\n📋 Final Answer:\n{answer}")
Run it:
bash
python agent.pyYou will see the agent reason through the question, trigger a Tavily search, read the results, and synthesize a structured answer. The iteration counter in the output tells you exactly how many tool calls it made.
Step 9: Add Persistent Memory Across Sessions
The agent above forgets everything between runs. For production agents that serve repeat users, that is a problem. Add Mem0 to give your agent persistent, cross-session memory in under 20 lines.
bash
pip install mem0aipython
from mem0 import MemoryClient

memory = MemoryClient(api_key=os.getenv("MEM0_API_KEY"))

def reason_with_memory(state: AgentState) -> dict:
    """Reasoning node with persistent user memory."""
    user_id = state.get("user_id", "default_user")
    current_query = state["messages"][-1].content

    # Retrieve relevant memories for this user
    memories = memory.search(
        query=current_query,
        user_id=user_id,
        limit=5
    )

    # Inject memories into the system context
    if memories:
        memory_text = "\n".join([f"- {m['memory']}" for m in memories])
        system_context = f"What you know about this user:\n{memory_text}"
    else:
        system_context = "No prior context for this user."

    # Add memory context to the messages
    from langchain_core.messages import SystemMessage
    messages_with_context = [SystemMessage(content=system_context)] + state["messages"]

    response = llm_with_tools.invoke(messages_with_context)

    # Store the current interaction as a new memory
    memory.add(
        messages=[{"role": "user", "content": current_query}],
        user_id=user_id
    )

    return {"messages": [response]}
Persistent memory reduces token usage by 30–60% for repeated tasks by replacing verbose context reconstruction with targeted memory retrieval. For agents serving the same users repeatedly — customer support, research assistants, personalised tutors — this is the single highest-impact optimisation available.
Step 10: Add Observability
You cannot improve what you cannot see. Add LangSmith tracing to get full visibility into every reasoning step, tool call, token count, and cost:
bash
pip install langsmithpython
from langsmith import traceable

@traceable(name="research_agent_run", project_name="databusinesscentral-agents")
def run_agent_traced(question: str, user_id: str = "default") -> str:
    return run_agent(question)
Set these environment variables:
LANGCHAIN_TRACING_V2=true
LANGCHAIN_API_KEY=your_langsmith_key
LANGCHAIN_PROJECT=databusinesscentral-agents
Every agent run now appears in your LangSmith dashboard with a full execution trace. You can see exactly which tools were called, in what order, with what arguments, and at what token cost. This is not optional for production agents — 47% of stalled agent programs have no automated evaluation running at month 12, and programs without continuous evaluation lose 14 to 23 percentage points of accuracy over 18 months.
The Complete File Structure
After following this guide, your project should look like this:
my-first-agent/
├── .env                   # API keys — never commit this
├── .gitignore             # include .env
├── requirements.txt       # pinned dependencies
├── agent.py               # main agent logic
└── README.md
Your requirements.txt:
langgraph==0.3.34
langchain-anthropic
langchain-community==0.3.19
tavily-python==0.5.0
python-dotenv==1.1.0
mem0ai
langsmith
What to Build Next
Once this agent is running, three natural extensions will take it to production quality:
Swap the checkpointer for PostgreSQL. Replace InMemorySaver with PostgresSaver from langgraph-checkpoint-postgres. Your agent now survives process restarts and supports time-travel debugging.
Add structured output validation. Wrap your agent in Pydantic AI to guarantee that every LLM response conforms to a defined schema. No more silent failures from malformed LLM output corrupting downstream systems.
Add NeMo Guardrails. Define topic restrictions, output validation rules, and jailbreak resistance policies before your agent goes anywhere near real users. 88% of enterprises deploying AI agents report security incidents — guardrails are the most systematically underinvested layer of the Python AI agent stack.
The agent you built in this guide is not a demo. It is the core architecture that Klarna, Uber, and LinkedIn are running at scale, compressed into a beginner-accessible tutorial. The framework, the reasoning loop, and the state management pattern are identical — only the tools and the LLM differ.
The agentic AI market is growing at 44.8% annually. The gap between developers who can build agents and those who cannot is widening at exactly the same pace. You have closed that gap today.
